
In this Field Guide to House Wrap & Seaming, we’ve gathered the most important installation and seaming tape tips to build quality, energy-efficient buildings.
We will cover building code best practices, how to install housewrap (the right way), how to prevent common house wrap problems, reasons why housewrap can still leak, and how seaming tape can make your building project airtight and moisture-proof.
House Wrap vs Vapor Barrier — What’s the Difference?
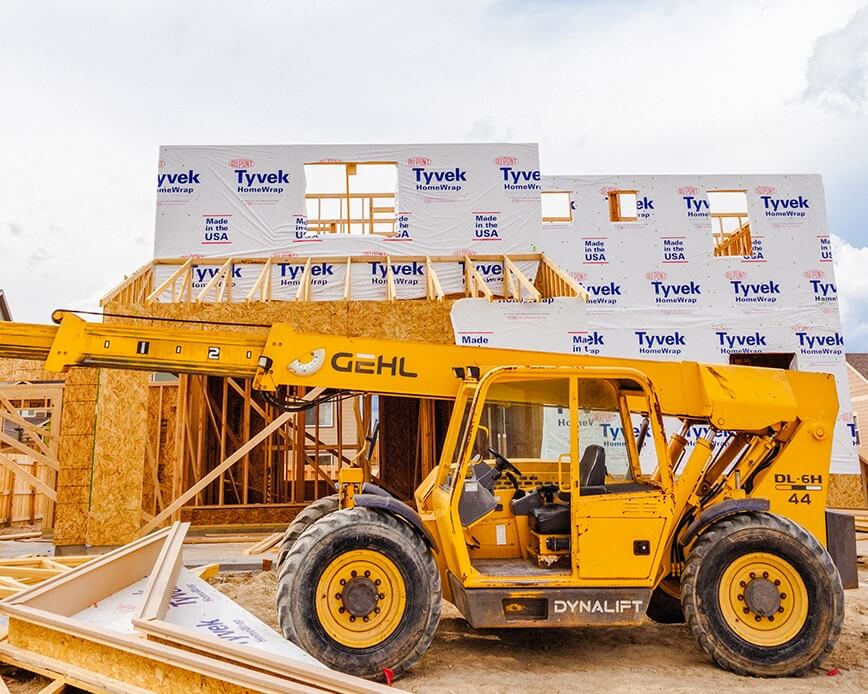
House wraps are installed to the outside surface of a home’s envelope, undersiding, or exterior cladding.
Housewraps must be permeable enough to allow water vapor to pass through them from the warm side, but still, stop bulk water like rain from entering on the cold side — similar to a Gore-Tex jacket.
Per Building America guidance, house wrap should be lapped shingle style over any exterior wall flashings installed around openings, penetrations, or where the walls intersect roofs, foundations, or other transitions. Any holes through the wall, such as for windows, water spigots, exhaust vent outlets, HVAC condensate lines, or light fixtures and receptacles, should be carefully sealed and flashed. It’s very important for any water vapor that makes it to the backside of an air barrier to keep moving so it gets to the air around the home.
Vapor barriers, on the other hand, are used to stop water vapor from entering a wall cavity, where the gas can turn into liquid water if it contacts a cold surface. If this happens and the water can’t evaporate quickly, wood rot, mold, and mildew become a reality. A reality that is trapped on the inside of your wall.
No bueno.
The placement and permeability of vapor barriers and house wraps are addressed by building codes but vary by region. Vapor barriers are put on the inside face of wall studs in cold climates but they’re put on the exterior of homes in hot and humid climates.
The method? You want the vapor barrier as far away from the coolest wall surface as possible. In hot, humid climates, the cool side of the wall is the inside of the home, where the air conditioning is operating.
For an in-depth look at moisture in buildings, check out Building America’s moisture flow guide.
Related: read about the difference between air barriers and vapor barriers.
Why Does Perm Rate Matter?
Permeability (aka Perm rate) is the rate at which a house wrap allows water vapor to pass through it.
Inexpensive or poorly made house wraps often have perm ratings in the 8 to 12 range, and they should be avoided.
This is especially true for older homes in cold climates with little or no moisture barriers. Moisture will escape through the wall cavity and sheathing, and if the house wrap doesn’t allow it to pass through fast enough, it will condense and accumulate in the form of frost and ice. When the ice thaws, you’ll end up with wet sheathing and/or wall cavities—not good.
Instead, choose high-quality house wrap with a perm rating over 50.
Building Code is Best Practice for House Wrap Installation
Though many builders think of the IRC as the bare minimum requirement, when it comes to WRB installation the code is actually ‘best practice.’ It’s all in section R703 – Exterior Covering of the 2018 IRC.
R703.1.1 “The exterior wall envelope shall be designed and constructed in a manner that prevents the accumulation of water within the wall assembly by providing a water-resistant barrier behind the exterior cladding … and a means of draining to the exterior water that penetrates the exterior cladding.”
R703.2 addresses the Water-resistive barrier, giving builders and contractors two options for materials: #15 lb tar paper meeting ASTM D226 requirements OR “other approved water-resistive barrier” (Meaning: approved by the local building official.) The manufacturers of house wraps and other WRB materials generally obtain an ICC Evaluation Service Report that code officials rely on when determining whether to accept an alternative material to #15 tar paper or not.
When “Other approved materials… are used as a WRB they shall be installed in accordance with the water-resistive barrier manufacturer’s installation instructions.” There it is — the manufacturer’s installation instructions are referenced in the code and are enforceable by the local official.
It’s critical to select the right house wrap for a home’s climate, from the dozens of varieties available; but even before that, you’ll need to find out if a house wrap is required for code compliance in your jurisdiction. Once you’ve determined if it’s necessary to meet code, you must be sure to install the product in strict adherence to manufacturer specifications so that it functions as intended.
How to Install House Wrap The Right Way with Seaming Tape

While manufacturer instructions for installing housewrap vary, generally there are three main tasks involved: wrapping, taping, and flashing. (Click here to watch an exterior house wrap installation, courtesy of the NAHB Research Center.)
Wrapping
Wrapping should start at the foundation, or the base of the wall assembly, extending at least an inch past the wall-to-foundation intersection and continuing upwards like shingle installation with the higher course overlapping the lower.
Horizontal seams should overlap at least 2 inches and vertical seams a minimum of 6 inches.
We found this post on avoiding a bad wrap to be helpful.
Taping
All of the seams for the product should be taped according to manufacturer’s instructions. Most house wrap manufacturer installation instructions have minimum horizontal overlaps of 4-6 inches and minimum vertical overlaps of 6 -12 inches.
Most also require or recommend 1 in. plastic or metal cap fasteners. The caps protect the house-wrap from damage during installation and spread the surface area of the fastener over a broader area of the WRB so the fastener is less likely to tear through.
Double-sided seaming tape that’s applied on one part of the wrap with another course overlapping (think shingle lap) helps prevents moisture — and meets code requirements.
Flashing
One of the most precise jobs when working with house wrap is properly installing the product around windows and doors. Flashing of exterior windows and doors is critical in casting rainwater away from those areas so that assemblies remain dry and durable.
Plus, wherever roofs meet walls, kick-out and step flashing must first be installed before continuing the housewrap shingle-fashion over the flashing pieces. Otherwise, the roof/wall intersection creates a place where water will be pushed into the wall, causing major structural damage.
Check out this Technotes piece from the Home Innovation Research Labs and the Internal Code Council.
Here are three of our favorite flashing tape tips:
- Leave the outer release paper on until the flashing is stuck to the sill. That reduces the chances of the tape sticking to itself during installation.
- Use a square block to push the tape tight into the corners, being careful not to puncture the corner.
- Use a J-roller to push down the tape. Make sure to roll out any bumps and eliminate ‘fish mouth’ bubbles.
For more in-depth best practices watch this video from ProTradeCraft on proper house wrap installation.
The following are key takeaways:
- Extend house wrap below the mud sill—for water management, but also for air sealing. Seal the bottom of the house wrap to the sheathing with caulk or tape.
- Overlap the layers shingle-style as you go up the wall—like roofing shingles.
- Overlap vertical seams 6-12 inches.
- Overlap horizontal seams 6 inches (upper layer over lower layer).
- Fasteners: use a cap nailer because slap staples leak.
- Apply house wrap up the gables before installing exterior trim, even if the attic is not conditioned. House wrap is not just for air sealing the insulated parts of the house, it is mainly for water management. If the gable isn’t covered, water can get to the framing, and even behind the house wrap below.
- Wrap and seal the underside of cantilevers. Better yet, add a solid sheet good to cover the bottom, and wrap over that.
- Tape seams on flat house wrap with 2-inch tape; use 3-inch tape for wrinkled house wraps.
How To Prevent Common House Wrap Problems
The performance of a high-quality, vapor-permeable, house wrap is dependent on proper installation, careful handling, and limited exposure to UV radiation and outside elements. The goal of house wrap is to create an air and moisture barrier that also prevents moisture accumulation in the wall system. Ultimately, house wrap should boost a home’s energy-efficiency and create a healthy, comfortable indoor environment.
Our friends over at Barricade, pulled together the most common house wrap issues. Here’s what you need to know:
Improper House Wrap Installation. Experienced and skilled house wrap installers avoid common problems with house wrap by following several key steps when installing house wrap.
- House wrap is typically applied from the bottom of the building up, overlapping the horizontal joints by a minimum of six inches and the vertical joints by a minimum of twelve inches. Expand the house wrap over the footing top by a minimum of two inches.
- The house wrap should be fixed every 12 to 18 inches with specific stapling nails or nails designed to hold down house wrap material.
- Installation of house wrap around the window and door openings involves a Y-cut from corner to corner in the openings. Then, the loose material is folded through the openings and fastened securely.
- Seal all seams with manufacturer recommended tape, including over the layers, the top and bottom edges, and the rough openings. It is also essential to seal the areas cut by subcontractors during the installation of the cladding.
Problems with House Wrap Due to Rough Handling. Rough handling or long exposures to wind and construction debris can tear, rip, and cut the house wrap. These damaged areas of the house wrap will allow air and moisture to enter the wall system. It is critical to seal and repair all damage to the house wrap due to rough handling and overexposure to wind and construction debris.
Damage Due to Overexposure to UV Radiation. Overexposure of house wrap to the sun’s ultraviolet (UV) rays can discolor and photo-degrade the house wrap. UV exposure can also cause the house wrap to lose tensile strength and water repellency. In some cases, this can happen quickly, depending on the house wrap’s ultraviolet (UV) rating. The UV-rating of a house wrap is the maximum time a house wrap can withstand exposure from the sun before becoming damaged.
10 Reasons Why House Wrap Can Still Leak
House wrap is an air barrier that creates an airtight structure by stopping air flow through a building’s envelope. But for a house wrap to stop air flow, it should be continuous over the entire building enclosure and be durable over the lifetime of the building. Unfortunately, there are several reasons a house wrap can leak after installation.
- Housewrap seams that are not sealed properly can cause air leaks. Sealing house wrap joints with the manufacturer’s approved seaming tape can improve the wrap’s performance by about 20 percent. Sealing the seams after installing the house wrap is essential to an airtight building.
- Using the wrong fasteners can cause air leaks. It is crucial for airtightness to use manufacturer’s stapling nails or nails designed to hold down house wrap material. Also, nails should be at least 1-inch long and spaced 12 to 18 inches on-center.
- Not repairing the tears, rips, or cuts in the house wrap that occur during installation can lead to air leaks. It is critical to seal the damaged house wrap with code-approved contractor sheathing tape before covering with siding. Repair of larger tears in house wrap requires a taped 6-inch overlap of house wrap.
- Not sealing the bottom edges of the house wrap can lead to air leaks.
- Air leaks can occur if the house wrap is cut to lie flat before installing siding, but not repaired.
- Air leaks can occur if the edges of the house wrap, cut at the rough windows and door, are not sealed. This error is common when installing utilities, pipes, cable tv, etc. For airtightness, wrap the fabric around the edges of windows and doors to the inside of the frame and seal with house wrap tape.
- Improper overlapping of roles of house wrap can cause air leakage. Overlap and seal vertical seams by at least 6 inches. Overlap and seal horizontal seams by at least 4 inches.
- Air leakage can occur if the house wrap does not reach the top of the wall. The house wrap should wrap up and over the top plate.
- If the house wrap is left exposed to excessive UV rays, the house wrap may deteriorate rapidly.
- If a house wrap is not resistant to cold, it may crack at low temperatures.
Maximizing the air barrier potential of house wrap requires the use of a quality house wrap, along with skilled house wrap installers. A quality house wrap should have high-tear and tensile strength, UV stability, cold resistance and ease of installation, which will limit damage and errors during construction.
House wrap and vapor barriers can get complicated. The movement of water, the possibility of drying, which side is warm or cool — these all factor into the success of a building’s envelope. However, getting the installation right is the final detail, ensuring that a well-chosen wrap or barrier actually performs as intended. Time spent making sure the details, like taping and flashing and placement, are all correct, means success in the long run.
After years of testing, and working with high-performance building professionals, ECHOtape has released its own seaming tape, PE-M4535 All Weather Construction Seaming Tape in addition to its All Weather Double-Sided Tape. Formulated with a proprietary cold weather adhesive, it is engineered to adhere to a wide range of building materials and surfaces including house wrap, exterior, and rigid insulation, sheathing, vapor barriers, and a variety of underlayments.
If you’re a building contractor, ask us about a sample roll.
