It’s impossible not to take splicing for granted because it’s hidden in the smallest, most disposable objects around you. Take, for example, your favorite morning coffee. That to go coffee cup? The corrugated sleeve? Both made possible by splicing, and splicing tape. The shipping box at the post office? Spliced. Foam meat tray? Spliced.
In this guide to splicing with adhesive tape, we’re giving you all the information you need to know about choosing and using splicing tape in manufacturing.
What Types of Products use Adhesive Tape for Splices
So what is a splice, exactly?
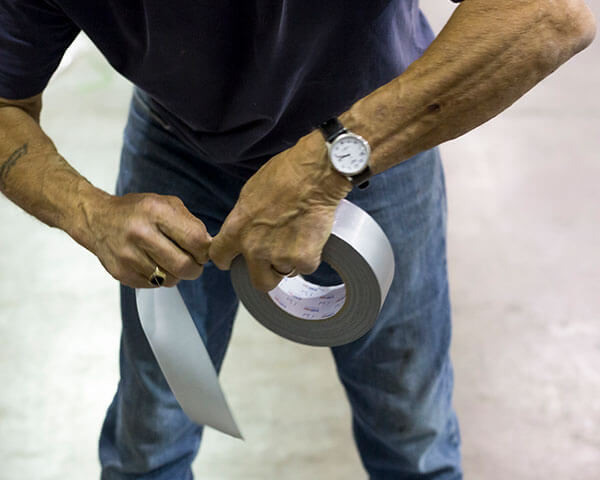
In the tape world a splice is a process by which two rolls are combined using tape in order to create one seamless continuous roll. This is done because the roll of material is getting unwound and is going through some manufacturing or converting process to create an end-use product, like a coffee cup sleeve or an Amazon box.
In simple terms, when you have something on a roll (i.e. paper or film) and it needs to go through a converting process to make a finished product (i.e. envelopes, bags, boxes, newspapers, coffee sleeves, packaging), you need to “join” the rolls together to keep manufacturing process going. The process by which these two rolls are combined is called splicing. As one roll is unwound, it gets spliced roll to roll with tape.
- Anything that comes on a roll is spliced; for example, canvas, house-wrap, and tarps for trucks.
- Starbucks cups are spliced. First, there’s the paper to make the cup which is unwound and spliced, then converted into the cup shape. Then there’s the paper to the make the sleeve by using a more expensive corrugated paper on the inside and smooth paper on the outside, both of which have been spliced.
- Corrugated material is the stuff that boxes are made from and they splice paper to make this. But corrugate paper and cardboard are not the same things. Corrugated (or pleated) material is made up of three different layers of paper: an inside liner, an outside liner, and fluting which runs in between. Cardboard is a heavy-duty paper stock known as paperboard. It’s rarely used in heavy-duty packaging. Instead, think cereal boxes and other smaller consumer goods packages.
- Fruit and vegetable trays. Rolls of foam are spliced before they are converted to the foam trays that you see in grocery stores.
- Packaging in all forms is spliced. Shipping boxes begin the same way as coffee sleeves — corrugate paper that is spliced with three different layers. Coated film for packaging, such as potato chips, plastic bags, and chocolate bars, is spliced. It all starts as a wide roll of material which is then cut to narrower or shorter widths and lengths, which then go on a converting line to become the outer packaging.
- Laminate flooring starts as a giant sheet of vinyl that needs to be spliced.
Obviously, the list goes on, but you get the idea. Splicing makes our daily lives more efficient and more enjoyable, and splicing tape is the product that makes it possible.
That said, just as not all adhesives are created equal (read more about that in our Complete Technical Guide to Adhesive Tape), not all splices are the same, and not all splicing tapes share the same qualities. Newsprint requires a different kind of tape than Styrofoam. Corrugate paper is different than vinyl. If the tape doesn’t stick properly, the machines have to be shut down and re-threaded. That can mean thousands and thousands of dollars in lost revenue. In fact, paper mills today do not stop machines at all – they run 24×7. Which is why finding the right tape for the right splice is paramount
How to Choose the Right Splicing Tape
Depending on what you are converting, the manufacturing process, and the substrate, there all kinds of possible splices. Choosing the wrong one not only increases the risk of tearing but can slow down the converting process or stop it altogether.
Splicing tape is no different. Available in a variety of carriers with different adhesive systems, splicing tapes may be single or double-coated; have a polyester, film, or paper carriers; have high-temperature adhesives; be repulpable; the list goes on. How do you choose? Well, like much else in our industry, it’s about choosing the right tape for the right application and conditions. Here’s a quick primer:
Know the Application. What kind of splice is it and how will it be used?
- Butt splice. This is a single-sided splice. The paper is not overlapped; rather it butts up against each other and you use a single-sided tape to connect the two pieces over the seam.
- Overlap splice. This is a double-sided splice, where the ends are overlapped.
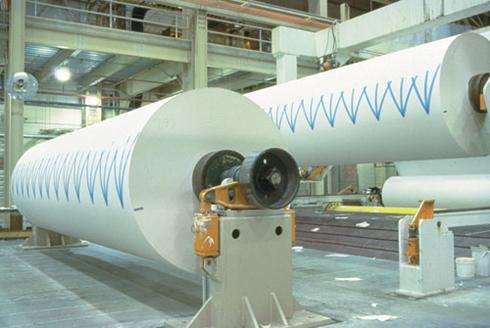
- W or V splice. Although W and V splices are being phased out, the process was most often used in newsprint and paper mills. The W or V pattern of the tape application creates more surface area, making the seam less likely to tear.
Is this a Single or Double Coated application?
- Single-coated splicing tape is suitable for butt splicing.
- Double-coated splicing tapes are suitable for use with laminators, coaters, and other converting operations. Double-sided tapes are commonly used in flying splices, manual splices, core starting, and roll finishing applications.
What Kind of substrate are you sticking too? Paper. Corrugate. Foam. Rubber. Even metal can be spliced. You must know the material, or substrate, the tape is adhering to. For example, coated paper is harder to splice. Used for specialty applications, such as produce boxes and foodservice containers, coated paper requires an aggressive splicing tape with higher tack and quick start.
Special finishes that get laminated to wallboard, often used in anti-mold or fireproof products in commercial buildings, are also challenging. They may require an aggressive splicing tape with a very high-temperature range.
What field conditions are you dealing with?
- Temperature. Will the splice be subjected to heat? cold? For example, in certain manufacturing processes, flying splices may often need to go through a heat chamber and so high-temperature resistance is critical so the tape does not fail.
- How fast or how slow? Manual or zero speed splices happen by hand, so the roll or machine is either not moving or is moving so slowly (zero speed) that getting a good stick is easier. Flying splices, on the other hand, happen quickly. Both rolls are moving very quickly, yet the splice still needs to get made. For example, the LA Times flying splice is 1200’ per minute! This type of splice requires immediate high tack because there’s only one chance to stick.
- Moisture or Humidity. Repulpable splicing tapes dissolve in water. These splicing tapes ensure that the substrate and adhesive do not gum up the machinery and stop the production process in the production of paper, where water is used.
5 Reasons Why Splicing Tape Fails
Even if you know your substrate and field conditions, complications may still arise. Whether splicing tape fails because of weakness (snap or tear), carelessness (installation error), or conditions (extreme heat), shutting down any production line is not only incredibly expensive but potentially catastrophic. Which is why it’s so important to understand how and why splicing tape failures happen. In our experience, splicing tape failures typically occur for one of five reasons:
- Temperature. Once a splice is made, many times they will get subjected to high heat down the manufacturing line. We’re talking 350-degrees or higher. And as we already know, the tackiness of the adhesive tape is very temperature-dependent. Too cold and the tape won’t bond. Too hot, and the bond might melt.
- Operator error. It’s not always roll and go. Did you put enough pressure on the tape? Did you clean the surface before applying the tape? Did you remember to remove the liner? (Yes, that happened!)
- Machine miscalibration. Machines rely on two things to stay running properly: a skilled operator and routine calibration. If a splice bar isn’t calibrated properly, the splice might fail. It appears like an adhesive failure, but a micrometer difference in pressure or angle could affect the success of the splice.
- Speed. Flying splices are called that for a reason. They are splices done at very high speeds. You not only need a high tack for a quick stick, but you need it to hold. Splicing tape failures can happen if you do not get one of these features in the tape you select.
- Tape release. This one is simple… you didn’t choose the right tape for the substrate.
How To Prevent Splicing Tape Failures
- Test, and test again. We get it. The package label made monumental promises, but generally speaking, tape testing should always be done prior to use and in the field with real conditions. Always test the tape to make sure it delivers the performance you expect.
- Check the temperature. Carefully factor in the temperature variables, everything from storage temperature, ambient temperature, and running temperature.
- Check the speed and stress. How fast does the tape have to be applied? How quickly does it need to adhere? What about the stress factor? Splicing tape has to handle stress because the tape is the only thing holding one roll to another.
- Consider the substrate. The correct tape for the right surface is critical. With new and improved products being made every day by manufacturers, substrates changes, and sometimes the tape for splicing needs to as well.
- Proper storage. Tape storage is sometimes critical for success. When materials are bought in bulk and stored in dirty, wet, or extremely hot or cold conditions for extended periods of time, the tape adhesive could deteriorate.
The bottom line: Every splice has a unique set of variables which is why you need a unique splicing tape for the job. If you have questions or concerns about a splicing issue or tape failure, let us help. We love solving tape challenges.